Showing posts with label tutorial. Show all posts

Friday, January 6, 2012

Valentine's Day Tic Tac Toe Game


With Valentine's Day approaching...I thought I'd share a quick and easy project that you can whip up in no time flat!!

{I was ambitious one year and made one for all the kids in my daughter's class at school ~ that was ALOT of hearts to cut out!!}


What you'll need:
~Sheet of felt - (I used purple)
~Scraps of felt in 2 different colors - (I used pink and white)
~White dimensional paint {I used Scribbles brand} -- (or just use yarn)
~Tacky glue


First - download the PDF pattern (click picture below to download):


From the 2 colors of scrap felt - cut out 5 (five) 1" squares of each color {10 squares total.}

Fold each square in half and cut out the heart {you don't need a template for this...just wing it...you probably made hearts like this in Kindergarten!! However, I did include a "sample" small heart to give you the approx. size on the PDF pattern sheet.}

You'll now have 10 small hearts - 5 of each color.


Using the PDF template, cut out one large heart from felt.

Also, cut out a 3"x3" square from felt.


Using tacky glue on 3 of the 4 sides of the 3"x3" square, glue the square to the large heart. {This is the pocket to store the little heart pieces.}
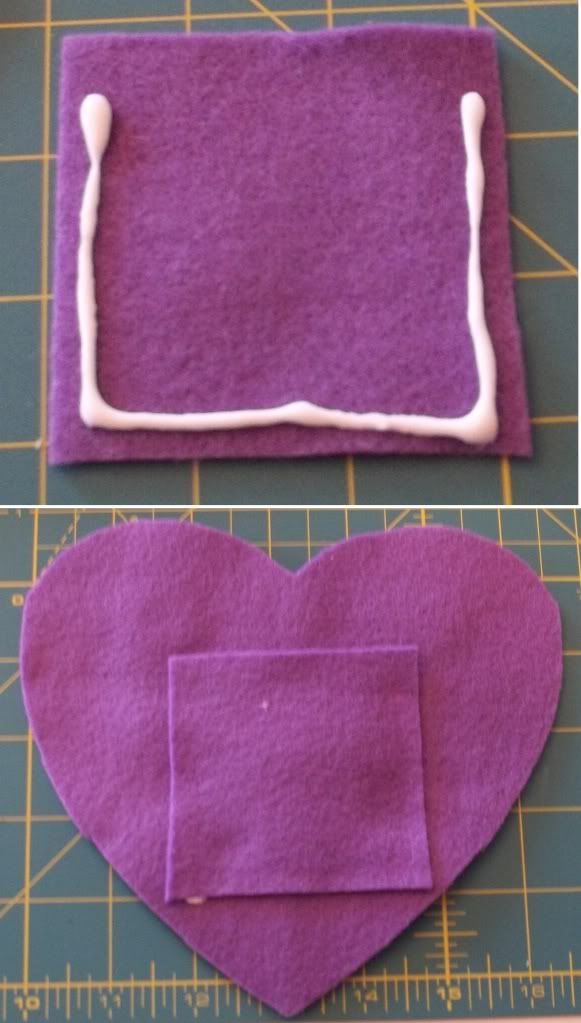


With the dimensional paint {or use tacky glue and yarn instead}...paint the tic tac toe lines on the front of the heart. **Use the PDF template as your guide for placement.**
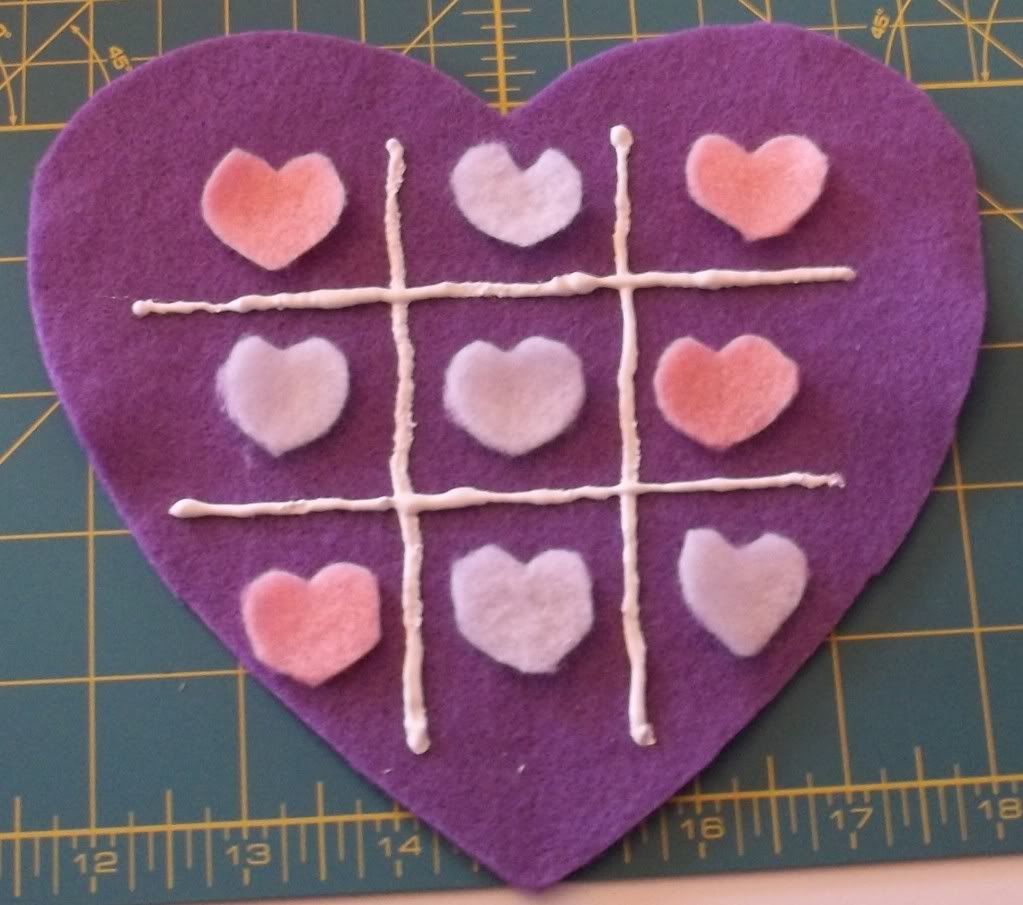


Let the paint dry! Store the little heart pieces in the back pocket.


Makes a CUTE alternative to a Valentine's Day card!!



Click here to see the parties I linked up to!!

Thursday, December 29, 2011

{Toddler} Pants Fall Down??...Fix 'Em...SUPER FAST and EASY!


My son is skinny and his pants don't stay up (unless they're the ones with the adjustable waist!) So...when his birthday (and Christmas) came...and he got LOTS of much-needed new pants to wear...I was thrilled!! But...when we put them on...they all fell down.

Now...I LOVE to sew...but I do NOT love to mend/alter/fix clothing. So...I came up with a QUICK and SUPER-EASY way to keep his pants up!!

---------------------------------------------------------------------

All you need is some 1" wide elastic (you could probably use 3/4" wide, too)!!

---------------------------------------------------------------------


First...measure your child's waist (don't measure too tight!).


Second...cut the elastic 1" longer than the waist measurement (my son's waist measured 18"...so I cut a 19" piece of elastic.)


Form a circle with the elastic by overlapping one end on top of the other (with about an inch of overlap). Stitch the overlap in place by stitching a "square" around the edges {you may want to do a zigzag stitch at the edge so the elastic doesn't fray.} **I used black thread so it's visible for the pictures.**


Next, starting about an inch or two to one side of the sewn overlap, draw a line {using a regular pencil...or an erasable marker...doesn't matter too much}.


Draw 3 more lines - evenly dividing the elastic "circle" into fourths. {Fold the elastic in half, and fold it again to find the quarter marks.}
**See pic below {the sewn overlap part is facing to the right in the picture}**


Next...we sew.


Line up the line nearest the overlap even with the center back of the pants...and pin in place.


Sew over this line. ***Be sure to backstitch at the top and bottom!!!**
{***NOTE: If any of the seams are extra bulky,
you may need to sew a little to the right or left of the seam.***}


Now...pin the next line to one of the side seams...and sew in place.


Repeat the above steps to pin and sew the front seam...and then the remaining side seam.


All finished and ready to wear ~ WITHOUT FALLING DOWN!!


Quick...Easy...and...Cheap!!

{Plus...it's easy to remove, if needed!!}


Click here to see the parties I linked up to!!

LinkWithin


Related Posts Plugin for WordPress, Blogger...